
Tracheostomy Home Care for Kids: A Parent's Guide

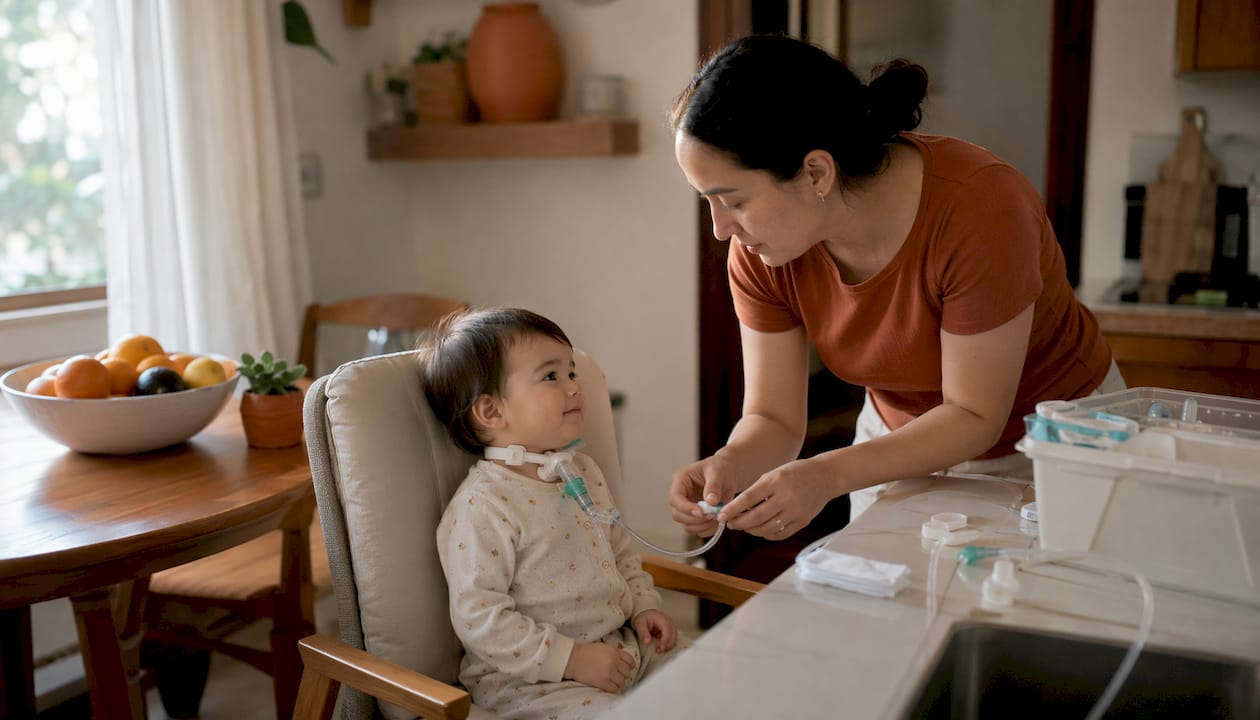
If your child has a tracheostomy, the single most important thing you can do right now is memorize three steps: assess the airway, attempt suction or clearance, and replace the tube or call 911 if you cannot clear it. Everything else in tracheostomy home care for kids builds on that foundation.
When the trach looks or sounds blocked, start here:
Assess responsiveness and airway. Is your child breathing? Are they moving air? Look, listen, and feel at the tube opening.
Attempt suction. Pass a suction catheter to clear secretions. If the catheter won’t pass, the tube itself may be blocked.
Replace the tube if trained. Use the spare same-size tube taped to the bed. If reinsertion fails, try the ½-size smaller backup.
Call 911 immediately if you cannot reinsert the tube, if your child is unresponsive, or if breathing does not improve after reinsertion. Begin CPR if there is no pulse or breathing.
For accidental decannulation (tube falls out), cover the stoma loosely with a clean cloth to maintain some airway protection, attempt reinsertion if trained, and call 911 if you cannot replace it within seconds.
Routine safety priorities that prevent most emergencies: wash hands before every trach care task, keep humidification running to prevent mucus plugging, and store spare supplies within arm’s reach at all times. Your hospital’s ENT, pulmonology, and speech-language pathology (SLP) team will have signed off on your discharge competency before you ever do this alone. That training is the real safety net.
Pro Tip: Tape a laminated emergency script to the head of the bed. Include your child’s tube size, the reinsertion steps, and your ENT’s after-hours number. When adrenaline is high, you will not remember details you know cold on a calm day.
Table of Contents
How do you keep a tracheostomy tube clean and secure at home?
How do you care for the skin and stoma around a tracheostomy?
What equipment and supplies does every trach household need?
What is the emergency action plan for a tracheostomy obstruction or accidental decannulation?
How do speech-language pathologists support a child with a tracheostomy?
How do you prepare for discharge and arrange in-home nursing support?
Opulentprivatecare: matched pediatric nurses for trach families in Georgia
How do you keep a tracheostomy tube clean and secure at home?
Daily tube care is where most of the work happens, and it gets faster with practice. Pediatric ENTs consistently report that the fear around these tasks drops quickly once families build a consistent daily schedule.

Cleaning the inner cannula
Not all pediatric trach tubes have an inner cannula. If yours does, it is the removable inner sleeve that sits inside the outer tube and catches secretions. Leaving it dirty narrows the airway and raises infection risk.
Remove the inner cannula by twisting and pulling gently outward.
Rinse under cool running water, then use a small brush (provided at discharge) to scrub the inside.
Rinse again, shake off excess water, and reinsert. Do not use hot water; it can warp the plastic.
Clean it at least once per shift, or more often if secretions are thick.
If the inner cannula is disposable, replace it on the schedule your team prescribed rather than cleaning it repeatedly.
Tube replacement: who does it and when
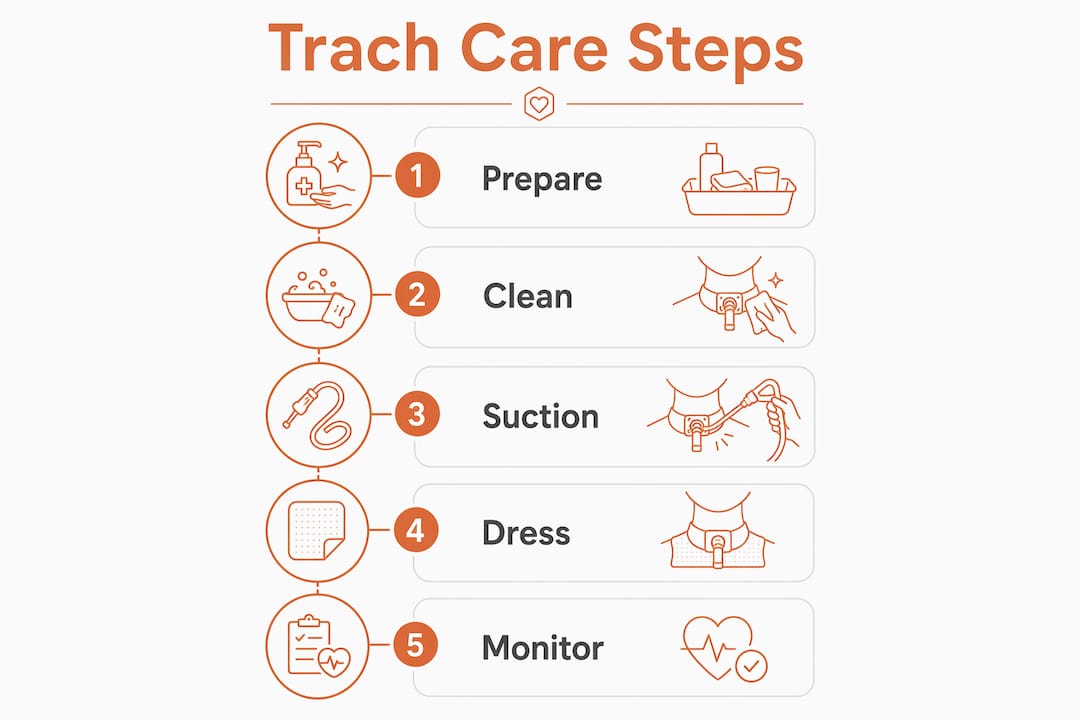
Routine tube changes are typically scheduled periodically, with timing depending on your child’s tube type and your team’s protocol. The first several changes should be done with a nurse or clinician present. Once you are competent and signed off, you can perform them at home with a second adult assisting.
Always have the obturator (the smooth-tipped guide that goes inside the tube during insertion) immediately accessible. Never attempt a tube change without it.
Securing trach ties
Ties that are too loose allow the tube to shift and dislodge. Ties that are too tight cause skin breakdown under the neck. The standard check: you should be able to slide one finger comfortably between the tie and your child’s neck, but not two.
Change ties whenever they are wet, soiled, or fraying.
Use a two-person method: one person holds the tube in place while the other changes the tie. Never remove old ties before the new ones are secured.
Velcro trach ties are easier for daily use; twill ties are more durable for active older children.
Sterile vs. clean technique
Hospitals teach sterile technique during the inpatient stay. At home, many families transition to clean technique for routine cares, but you must follow your home health agency’s or Medicaid program’s specific requirements. If a skilled nurse is providing care under a Medicaid-funded model, the agency’s documentation and technique standards apply.
Routine tube care checklist:
[ ] Inner cannula cleaned or replaced
[ ] Ties checked for security and skin condition
[ ] Stoma site inspected (redness, drainage, granulation tissue)
[ ] Humidification device in place and functioning
[ ] Suction machine tested and catheters stocked
[ ] Supplies logged and reorder triggered if low.
Pro Tip: Schedule tube changes 30 minutes after a meal, not before. A child who just ate is calmer, and you reduce the risk of vomiting during the procedure. Use a favorite show or song as a distraction — it genuinely shortens the perceived time for both of you.
When and how should you suction a child’s tracheostomy?
Suctioning is one of the most anxiety-producing tasks for new trach parents, but the goal is straightforward: clear secretions before they block the airway or cause infection. The key is knowing when to suction and when to leave the airway alone.
Signs that suctioning is needed
Audible rattling or gurgling at the tube opening
Increased breathing effort (nasal flaring, chest retractions, belly breathing)
Visible mucus at the tube opening
Oxygen saturation dropping on the pulse oximeter
Your child is restless, coughing repeatedly, or looks uncomfortable
Do not suction on a fixed schedule if none of these signs are present. Overuse causes mucosal trauma and irritation, which actually increases secretion production over time.
Step-by-step suction technique
Wash hands thoroughly. Put on clean gloves.
Select the correct catheter size. Your team will specify this at discharge; a catheter that is too large can occlude the airway during suctioning.
Set suction pressure to the level your equipment provider and care team prescribed. For most pediatric patients, suction pressure settings are typically within a certain recommended range, but confirm the exact setting with your team.
Pre-oxygenate if your child is on supplemental oxygen or a ventilator.
Insert the catheter to the prescribed depth only. Do not force it past resistance.
Apply suction while withdrawing the catheter in a slow, rotating motion. Each pass should take no longer than 10 seconds.
Allow your child to rest and breathe between passes. Limit to 2–3 passes per episode unless secretions are heavy.
Rinse the catheter with sterile water between passes.
Saline instillation: when and when not to
Routine saline instillation before suctioning is no longer recommended as standard practice by most pediatric programs. It can push secretions deeper and cause oxygen desaturation. Use it only if your care team has specifically prescribed it for thick, difficult-to-clear secretions.
Troubleshooting
Catheter won’t pass: The tube may be partially blocked. Attempt one more pass; if still blocked, change the tube immediately.
Suctioning needed more than every 2 hours: Call your care team. Increased secretions can signal infection, a respiratory illness, or a tube that needs changing.
Catheter reuse: In a true emergency when supplies run out, a catheter can be rinsed and reused once. This is not standard practice; restock supplies before you reach that point.
Pro Tip: Keep a simple log: time, number of passes, secretion color and consistency. Thick yellow or green secretions, or a sudden increase in frequency, are the two patterns that most reliably predict an infection before other symptoms appear. That log is also the first thing your care team will ask for at a clinic visit.
How do you care for the skin and stoma around a tracheostomy?
The skin around the stoma takes a beating from moisture, secretions, and the constant pressure of the tube and ties. Keeping it clean and dry is the single most effective way to prevent breakdown and infection.
Daily stoma cleaning
Clean the stoma site at least once daily, or more often if secretions are heavy.
Use a cotton-tipped applicator or gauze dampened with normal saline or sterile water. Gently remove crusted secretions from around the tube and stoma edges.
Dry the area thoroughly after cleaning. Moisture trapped under the dressing is the primary driver of skin breakdown.
Never use hydrogen peroxide routinely unless your team specifically prescribes it; it can damage healing tissue.
Dressing guidance
Use a pre-cut trach dressing (a split gauze pad designed for this purpose) rather than cutting regular gauze, which leaves loose fibers that can enter the airway. Place it under the tube flange to absorb secretions.
Change the dressing whenever it is wet or soiled. If drainage is heavy, check and change the dressing frequently. A saturated dressing sitting against the skin is a direct path to maceration and infection.
Never pack gauze tightly around the stoma or use dressings that could occlude the tube opening.
Recognizing skin complications
Mild redness around the stoma: increase cleaning frequency and keep the area dry.
Granulation tissue (small, raised, reddish bumps at the stoma edge): common in pediatric trach patients. Report it to your ENT at the next visit; it often requires silver nitrate treatment in clinic.
Tracheal stenosis signs (increasing difficulty breathing, stridor, or a tube that suddenly feels tight): call your ENT promptly. Stenosis is a narrowing of the trachea that can develop over time and may require bronchoscopy or surgical intervention.
Purulent drainage, foul odor, fever, or spreading redness: these are signs of infection. Call your care team the same day. A wound culture may be needed before antibiotics are prescribed.
Skin complications are among the most common issues in pediatric trach care. Consistent daily cleaning and prompt dressing changes catch most problems before they escalate.
What equipment and supplies does every trach household need?
Getting the supply setup right before your child comes home is not optional. A missing obturator or a dead suction machine battery at 2 AM is a genuine emergency.
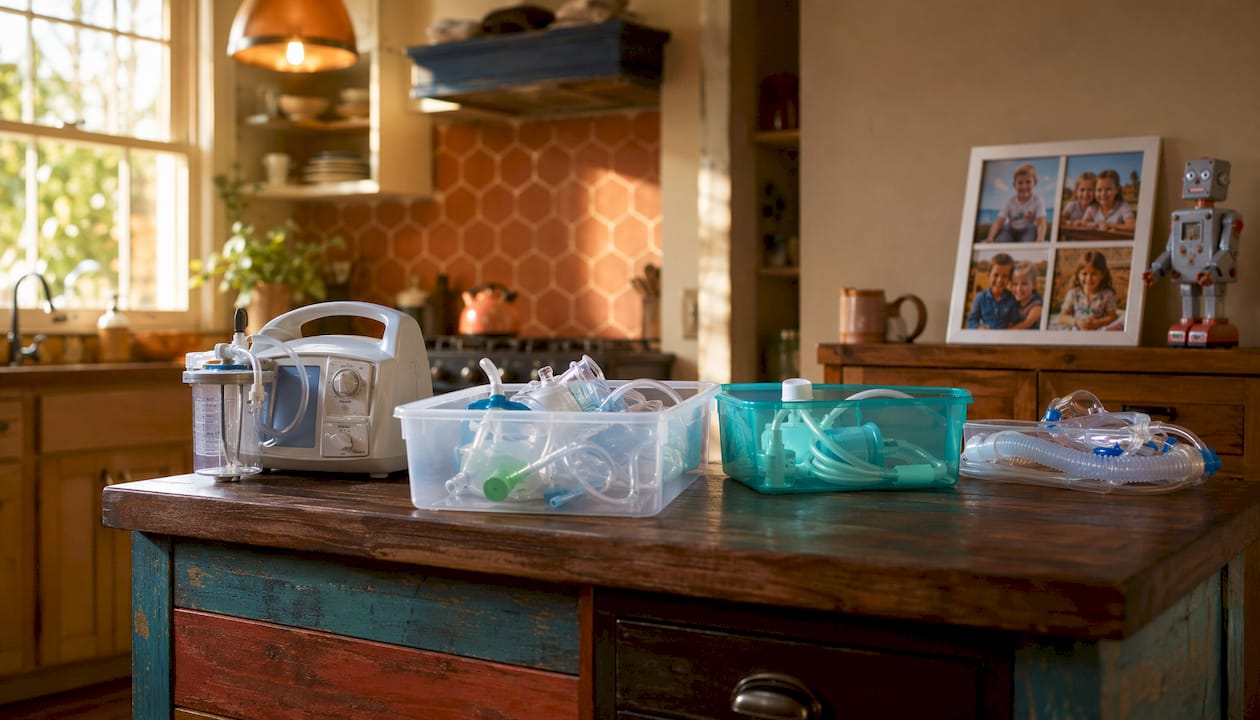
Essential equipment list
Item | Purpose | Storage location | Replacement/check frequency |
Portable suction machine | Clear secretions from the airway | Bedside; backup in travel bag | Test daily; service annually |
Spare trach tubes (same size) | Emergency tube replacement | Taped to head of bed + travel bag | Replace after use or expiration |
Spare trach tube (½ size smaller) | Backup if same-size won’t insert | Taped to head of bed + travel bag | Replace after use or expiration |
Obturator | Guide tube during reinsertion | Attached to spare tube | Keep with each spare tube |
Resuscitation bag and mask | Manual ventilation in emergency | Bedside | Check seal and valve monthly |
Suction catheters (correct size) | Suctioning secretions | Bedside drawer; travel bag | Restock weekly or as used |
Heat-moisture exchanger (HME) | Passive humidification | On tube during activity/outings | Replace per manufacturer schedule |
Mist collar or humidification system | Active humidification during rest/sleep | Bedside | Clean daily; replace filters per schedule |
Pulse oximeter | Monitor oxygen saturation | Bedside | Calibrate per device instructions |
Nebulizer | Deliver inhaled medications | Bedside | Clean after each use |
Backup power source | Power suction and compressor during outages | Bedside | Test monthly |
Two-kit system
Keep two fully stocked kits: a bedside kit with everything on the list above, and a portable travel kit in a dedicated bag that goes everywhere your child goes. The travel kit should include two spare tubes, the obturator, suction catheters, a manual resuscitation bag, HMEs, and a laminated card with your child’s tube size, emergency contacts, and your ENT’s after-hours number.
Humidification prevents mucus from drying and reduces the risk of mucus plugging. Never leave the house without at least one HME on the tube.
Confirm suction pressure settings with your equipment provider before discharge and again after any machine service. For backup power, contact your utility company to register your child as a medical-priority customer; many states require utilities to flag households with life-sustaining equipment.
Pro Tip: Keep a laminated master checklist inside the travel bag listing exact tube sizes, catheter sizes, and local emergency contacts. Experienced trach families swear by this. When you are rushing out the door or responding to an emergency, you will not have to think.
What is the emergency action plan for a tracheostomy obstruction or accidental decannulation?
Print this section. Laminate it. Tape it to the wall.
Mucus plugging or obstruction
Stay calm. Assess your child: are they moving air? Is the chest rising?
Attempt suctioning immediately. Pass the catheter to the prescribed depth.
If the catheter won’t pass, the tube is blocked. Remove the inner cannula if present and attempt suction again.
If still blocked, change the tube. Use the same-size spare.
If breathing does not improve after tube change, call 911.
Accidental decannulation (tube falls out)
Cover the stoma loosely with a clean cloth to prevent aspiration while you prepare.
If trained, reinsert the same-size spare tube with the obturator in place. Remove the obturator immediately after insertion.
Confirm placement: listen for air movement, watch chest rise, check the pulse oximeter.
If reinsertion fails after one attempt, try the ½-size smaller tube.
If that also fails, call 911 immediately. Keep the stoma covered and maintain the child’s airway as best you can.
For infants, the stoma tract closes faster than in older children. Do not delay calling 911 if reinsertion is not immediate.
Active bleeding from the stoma
Apply gentle pressure around (not into) the stoma with clean gauze.
Do not pack the stoma.
Call 911 for any bleeding that does not stop within 1–2 minutes or is bright red and pulsatile. Tracheal-innominate fistula is rare but life-threatening; any significant arterial bleeding near the trach is a 911 call, no exceptions.
When to call 911 vs. your care team
Situation | Action |
Tube out, cannot reinsert | 911 immediately |
Tube blocked, cannot clear | 911 immediately |
Active arterial bleeding | 911 immediately |
No breathing or no pulse | 911 + begin CPR |
Increased secretions, mild distress | Call ENT/home nurse |
Skin breakdown or suspected infection | Call care team same day |
Equipment malfunction (non-emergency) | Call DME provider |
After any emergency
Document the time, what happened, and every step you took. Notify your ENT and pulmonologist the same day. Arrange an earlier clinic visit. If your child has a seizure action plan as part of their care (common in children with neurological conditions), update it whenever weight or medications change, since rescue dosing is weight-dependent.
Practice the emergency plan with every adult who cares for your child, including babysitters and grandparents. A 15-minute rehearsal twice a year is enough to keep it sharp.
Pro Tip: Keep two spare tubes taped to the head of the bed, not in a drawer. The extra second it takes to open a drawer matters when your child is not breathing.
How does daily life work for a child with a tracheostomy?
Most children with trachs live full, active lives. The adjustments are real but manageable once you know the rules.
Feeding
Most children with tracheostomies can eat by mouth, but swallowing safety depends on the individual child. An SLP assessment before discharge determines whether oral feeding is safe and at what textures. Signs of unsafe swallowing include coughing or choking during meals, wet or gurgly voice quality after eating, and food or liquid appearing at the trach opening.
If your child also has a feeding tube, coordinate feeding schedules with your care team to avoid overloading the stomach, which increases vomiting risk. Vomiting with a trach in place can cause aspiration through the tube. If vomiting occurs, suction immediately and check that the tube is clear.
Bathing
Keep the stoma dry during baths. Use a specialized trach bib or a folded washcloth positioned to shield the tube opening. The stoma is not a direct open channel to the lungs in the way many parents imagine, but water entering the tube can cause aspiration and respiratory distress.
Avoid powders and aerosol sprays near the trach. Inhaled particles irritate the airway and can trigger coughing or bronchospasm. This includes baby powder, dry shampoo, and aerosol sunscreen.
Sleep
Use a pulse oximeter or apnea monitor during sleep, especially for infants and young children. Your care team will specify whether continuous overnight monitoring is required. Safe sleep positioning for trach children generally follows standard infant safe sleep guidelines, with the addition that the trach must remain unobstructed by bedding.
School and caregivers
Every adult who supervises your child must be trained in basic trach care: suctioning, emergency reinsertion, and when to call 911. Schools are required under IDEA and Section 504 to accommodate medically fragile students; request a health plan (IHP) that specifies the nurse-to-child ratio and emergency protocols.
Activities and swimming
Swimming is strictly contraindicated unless your ENT has given explicit written clearance and a specific safety protocol is in place. Water entering the trach tube poses a direct drowning risk. Safe water alternatives include shallow splash pads where the child’s neck stays above water, with a trained adult within arm’s reach at all times.
Pro Tip: Before any outing, run a 60-second checklist: pulse oximeter charged, travel bag packed with two spare tubes, trained adult present, and HME on the tube. Make it a habit and it takes less time than buckling a seatbelt.
How do speech-language pathologists support a child with a tracheostomy?
A tracheostomy changes how air moves through the vocal cords, which affects both voice and swallowing. SLPs are central to both.
Speaking valves
A Passy-Muir Valve (PMV) or similar one-way speaking valve redirects exhaled air upward through the vocal cords, allowing voice production. Before a speaking valve can be used safely:
The trach cuff (if present) must be fully deflated or the tube must be uncuffed.
There must be no active upper airway obstruction.
The child must be able to tolerate the increased breathing effort the valve requires.
Contraindications include a cuffed tube that cannot be deflated, significant tracheal stenosis, severe secretion management problems, or an unconscious or medically unstable child. Your SLP and ENT will conduct a formal trial before the valve is used at home.
Swallow assessment and therapy
SLPs use clinical swallow evaluations and, when needed, modified barium swallow studies or fiberoptic endoscopic evaluation of swallowing (FEES) to determine what textures and consistencies are safe. Therapy typically progresses from thin liquids to solids as swallow function improves.
Communication while working toward voice
While a child is building tolerance for a speaking valve, communication options include:
Picture communication boards
Voice output communication devices (AAC devices)
Simple sign language for younger children
Mouthing words, which many trach children learn quickly
Coordinate SLP visits with your trach care schedule. SLPs also contribute to emergency planning by documenting swallow status and feeding recommendations in the child’s care plan.
How do you prevent infections and recognize them early?
Infection prevention in trach care comes down to two things: hand hygiene and humidification. Get those right and you eliminate the majority of preventable complications.
Hand hygiene
Wash hands with soap and water for at least 20 seconds before and after every trach care task. Use alcohol-based hand sanitizer when soap and water are not immediately available, but soap and water are preferred when hands are visibly soiled or when caring for a child with a gastrointestinal illness.
Everyone who touches the child’s trach equipment should follow the same standard. This includes nurses, family members, and school staff.
Humidification
The tracheostomy bypasses the nose and upper airway, which normally warm and humidify inhaled air. Without supplemental humidification, secretions dry and thicken, increasing the risk of mucus plugging. Typical methods include mist collars during rest and sleep, HMEs during activity and outings, and nebulized saline when prescribed for thick secretions.
Clean humidification equipment daily. Stagnant water in a mist collar reservoir is a bacterial growth medium.
Recognizing infection
Call your care team the same day if you notice:
Increased redness, warmth, or swelling around the stoma
Drainage that is yellow, green, or foul-smelling
Fever above 100.4°F (38°C)
Sudden increase in secretion volume or thickness
Increased work of breathing without a clear mechanical cause
A wound culture is typically needed before antibiotics are prescribed. Do not start antibiotics without a provider’s order; inappropriate antibiotic use drives resistance and can mask the true source of infection.
Medications
Common prescriptions in trach care include topical skin treatments for stoma irritation, nebulized bronchodilators or mucolytics, and systemic antibiotics when a confirmed infection is present. Keep a running medication list with doses, frequencies, and allergy history in your medical binder. Share it at every clinic visit and every emergency room visit.
What does decannulation involve and what should you expect?
Decannulation means removing the tracheostomy tube permanently. For most families, it is the goal. For most children, it takes longer than anyone hopes.
Clinical criteria
The core requirements for decannulation are a stable airway (no significant obstruction), safe swallowing and secretion management, and adequate respiratory function without the tube. Teams typically confirm these through bronchoscopy to visualize the airway, a capping trial (the tube is plugged to force breathing through the natural airway), and observation over hours to days.
Timeline
Decannulation timing is individualized. Pediatric programs monitor airway stability, swallow safety, and respiratory status over months to years before removing the tube. Some children are decannulated within a year; others with complex airway anatomy or neurological conditions may need the trach for many years. There is no universal timeline, and comparing your child’s progress to another family’s is rarely useful.
What to expect during the process
Your team will typically downsize the tube gradually before a formal decannulation trial. During the capping trial, your child breathes entirely through the natural airway with the tube capped. If they tolerate this for 24–48 hours without distress or oxygen desaturation, decannulation proceeds in a controlled clinical setting.
After removal, the stoma usually closes on its own within days to weeks. Some children require a minor surgical closure.
Factors that delay decannulation
Recurrent respiratory infections
Granulation tissue causing partial obstruction
Tracheal stenosis at the stoma or subglottic level
Ongoing neurological instability affecting swallow or secretion control
If any of these are present, your ENT will address them before proceeding. Early intervention for granuloma formation (typically silver nitrate or laser treatment) and stenosis (dilation or surgical repair) keeps the decannulation path open.
How do you prepare for discharge and arrange in-home nursing support?
Discharge from the hospital is not the end of the learning curve. For most trach families, it is the beginning of the hardest part.
What hospital discharge training looks like
Hospitals provide structured discharge education that includes multiple hours of classroom content, hands-on bedside training, and at least one overnight stay to practice independent trach care with nursing supervision. Many centers require families to demonstrate competency during a 24-hour independent care period before the child goes home.
Caregivers must demonstrate competency in the following before discharge:
Inner cannula cleaning and replacement
Trach tie changes (two-person method)
Suctioning technique and pressure settings
Emergency tube replacement with obturator
Stoma cleaning and dressing changes
Equipment checks: suction machine, humidification, pulse oximeter
Emergency action plan: obstruction, decannulation, bleeding
Do not leave the hospital until you feel confident in all of these. Ask for more practice time if you need it. That is not a weakness; it is the right call.
Arranging in-home nursing
Durable medical equipment (DME) is typically coordinated by the hospital’s discharge team. The suction machine, humidification equipment, and pulse oximeter are usually delivered to your home before discharge.
For skilled nursing hours, families in Georgia can access the Georgia Pediatric Program (GAPP), a Medicaid-funded program that covers in-home skilled nursing for medically fragile children. GAPP paperwork is detailed and time-sensitive; having an agency that knows the process helps families avoid delays in getting approved hours.
Discharge coordinators consistently note that parents often feel they must manage alone, but hiring skilled pediatric nurses is a practical safety strategy that prevents burnout and helps with paperwork like Medicaid GAPP applications. Skilled nursing is not a last resort; it is part of the standard of care for medically complex children.
Caregiver burnout and psychosocial support
Trach care is physically and emotionally exhausting. Two-caregiver households where both adults are trained manage significantly better than single-caregiver situations. If you are the only trained adult in your home, arranging skilled nursing coverage for overnight shifts is not optional; it is a safety measure.
Resources for caregiver support include:
Hospital social workers (ask before discharge)
Tracheostomy parent support groups (Aaron’s Tracheostomy Page and similar online communities)
Respite care through Medicaid waiver programs
Counseling through your child’s hospital’s family support services
The medical binder
Pro Tip: Keep a single portable binder with your child’s complete medical records, current medication list, tube sizes and catheter sizes, equipment serial numbers, all provider contact numbers, and your emergency action plan. Bring it to every appointment and every emergency room visit. Nurses and physicians will thank you, and it could save critical time.
Key Takeaways
Safe tracheostomy home care requires mastering a daily routine, keeping emergency supplies within arm’s reach, and knowing exactly when to call 911 versus your care team.
Point | Details |
Emergency steps to memorize | Assess airway, attempt suction, replace tube with spare, call 911 if reinsertion fails. |
Two spare tubes always accessible | Keep one same-size and one ½-size smaller tube taped to the bed and in the travel bag. |
Humidification prevents plugging | Use mist collars during rest and HMEs during outings to prevent mucus from drying and blocking the airway. |
Discharge competency is required | Hospitals require caregivers to demonstrate all core skills, including emergency tube replacement, before going home. |
Opulentprivatecare supports trach families | Opulentprivatecare provides matched in-home pediatric nurses in Georgia and helps families navigate GAPP Medicaid paperwork. |
What experienced trach families know that new ones don’t
The families who manage trach care most confidently are not the ones who were naturally calm or medically trained. They are the ones who practiced until the tasks became automatic.
There is a real gap between what new trach parents fear and what actually becomes hard. The tube changes and suctioning that feel terrifying in the hospital become routine within weeks. What catches families off guard is the cumulative weight of it: the overnight monitoring, the school advocacy, the supply reordering, the constant vigilance. That is where burnout lives, and that is where skilled nursing support makes the most practical difference.
The conventional wisdom is that families should try to manage independently as long as possible before asking for help. That framing is backwards. Bringing in a skilled nurse early, while you are still learning, means you have a trained partner to catch errors, reinforce technique, and handle overnight shifts so you can sleep. Sleep-deprived caregivers make mistakes. That is not a character flaw; it is physiology.
One scenario that comes up repeatedly: a parent who has been managing well for months hits a stretch of respiratory illnesses in winter, the child needs suctioning every 90 minutes overnight for two weeks, and the caregiver is running on four hours of sleep. This is exactly when a skilled nurse’s overnight coverage prevents a dangerous error. The families who had that support in place before the crisis fared far better than those who tried to arrange it in the middle of one.
The other thing experienced families consistently say: keep the medical binder current and bring it everywhere. The ER physician who has never met your child will make better decisions in the first five minutes if they can see the tube size, the last bronchoscopy report, and the current medication list without having to track anyone down.
Opulentprivatecare: matched pediatric nurses for trach families in Georgia
For families managing tracheostomy care at home in Georgia, the difference between struggling and managing well often comes down to one thing: having a skilled nurse who knows your child.
Opulentprivatecare provides in-home pediatric skilled nursing specifically for medically fragile children, including those with tracheostomies, ventilators, and feeding tubes. What makes the model different is the matching process: before any nurse starts, the family, the nurse, and Opulentprivatecare all have to agree it is the right fit. That “3 Thumbs Up Rule” means your child gets a consistent caregiver, not a rotating roster of strangers who need retraining every shift.
For families navigating GAPP, Opulentprivatecare’s team helps with the Medicaid paperwork that most families find overwhelming. Getting approved nursing hours through Georgia’s GAPP program requires documentation, coordination with your child’s physician, and follow-through on timelines. Having a team that has done it hundreds of times cuts the delay significantly.
Opulentprivatecare also publishes shift fill rates and nurse retention metrics, so families can see the reliability numbers before committing. For a trach family, a nurse who doesn’t show is not just an inconvenience; it is a safety gap.
If your child is preparing for hospital discharge or you are already home and feeling the weight of overnight care, contact Opulentprivatecare to request a nurse match and initial consultation. Bring your medical binder, your tube sizes, and your current nursing hours authorization if you have one. The team will walk you through the rest.
Authoritative sources and further reading
These are the sources cited throughout this guide. Each one is worth bookmarking, and several have downloadable PDFs worth printing for your medical binder.
Children’s Hospital of Philadelphia (CHOP): Caring for Your Child with a Tracheostomy at Home — One of the most thorough step-by-step guides available from a major pediatric center. Covers tube care, suctioning, emergency steps, and daily living in detail. Print the full PDF for your binder.
Children’s Minnesota: Tracheostomy — A Guide for Care at Home — Covers discharge preparation, spare tube policy, suctioning technique, and the two-person tie change method. Frequently cited by discharge nurses.
Connecticut Children’s: Pediatric Tracheostomy Care Handbook (2023) — Detailed handbook covering humidification, competency requirements, and caregiver training expectations. The 2023 edition reflects current evidence-based practice.
Lurie Children’s: Tracheostomy Care at Home — Practical patient education page with guidance on clean vs. sterile technique, bathing, and avoiding airway irritants. Good for sharing with school staff.
UC Davis Children’s: Pediatric Tracheostomy Handbook — Covers the role of skilled nursing, GAPP-adjacent supports, and caregiver burnout prevention. Useful for families considering in-home nursing.
Nationwide Children’s: Seizure Information for Parents — Relevant for children with tracheostomies who also have neurological conditions. Covers seizure action plans and rescue medication dosing, which must be updated with weight changes.
PMC: Evidence-Based Care of Children With Tracheostomies — Peer-reviewed review article summarizing the clinical evidence behind pediatric trach care protocols. Useful if you want to understand the research behind the recommendations your team gives you.
Share the CHOP and Children’s Minnesota guides with your child’s school nurse and any babysitters who will be providing care. These are the same materials hospital discharge teams use, and having a shared reference reduces the chance of conflicting instructions.
Recommended
Comments