
Traveling With a Ventilator-Dependent Child: A Full Planning Guide
- Opulent Private Care Services

- Aug 17
- 13 min read
Yes, families can travel with a ventilator-dependent child, provided they have clinician sign-off, backup equipment, and a written emergency plan before they leave home. This isn’t optimism talking. Pediatric long-term ventilation programs help families take flights, road trips, and international vacations every year, and the process is repeatable once you know the sequence. The FAA regulates how airlines must handle in-cabin medical devices, your child’s ENT or pulmonology team drives the medical clearance, and a solid travel insurance policy covers you if something goes sideways at 30,000 feet or three time zones from home.
Before you book anything, knock out these five things:
Call your child’s ENT, pulmonology, or long-term ventilation (LTV) team to start the medical clearance conversation.
Ask whether your child needs a Fitness to Fly or hypoxic challenge test before departure.
Notify the airline of your child’s equipment needs as soon as you have dates.
Start assembling the go-bag now, not the week before you leave.
Shop for travel insurance that covers medical evacuation and equipment loss.
Everything below walks through each of those steps in the order you’ll actually need them.
Key Takeaways
Safe travel with a ventilator-dependent child requires clinician clearance, backup equipment, a signed emergency plan, and practice drills completed before departure.
Point | Details |
Get clearance first | Contact ENT, pulmonology, or the LTV team weeks before travel to request Fitness to Fly testing if needed. |
Pack the full go-bag | Include spare trach tubes, extra circuits, a manual resuscitator, and restocked suction supplies. |
Carry backups in the cabin | Ventilators and related equipment ride with you, never in checked luggage. |
Confirm power math | Calculate battery runtime against total travel time plus a delay buffer before departure. |
Test alarms beforehand | Check alarm audibility in noisy, vibrating conditions and brief every traveling adult on what each one means. |
Table of Contents
How Do You Get Medical Clearance to Travel With Ventilator Child Support?
Medical clearance starts with the people who already know your child’s airway and settings best. That’s typically the ENT or pulmonology specialist, the long-term ventilation (LTV) team if your hospital has one, your child’s primary pediatrician, and the durable medical equipment (DME) company that services the ventilator. Each plays a different role in getting you cleared to travel.
The ENT or pulmonology team assesses whether your child’s airway and respiratory status can tolerate the trip. For some kids, especially those flying internationally or to high-altitude destinations, this includes a Fitness to Fly evaluation, sometimes called a hypoxic challenge test, which checks how a child’s oxygen saturation holds up under cabin-pressure conditions before you’re actually airborne. UC Davis Children’s Hospital notes that clinicians often require this test for ventilator-dependent children before both domestic and international travel.
Beyond the clearance itself, you need paperwork. Ask your team for a letter of medical necessity that spells out your child’s diagnosis, current ventilator settings, and any airway anatomy details a hospital or airport worker might need to know at a glance. Most airlines also have their own medical clearance form, and some carriers want it filed days in advance, so ask specifically about the airline’s timeline rather than assuming a standard window.
If more than one specialist is involved, get organized early. A child seeing ENT, pulmonology, and a home ventilator company doesn’t need three separate scattered documents. Consolidate everything onto one page.
Pro Tip: Ask your child’s primary clinician to sign a single-page emergency summary listing diagnosis, ventilator settings, trach tube size, allergies, and two clinician phone numbers. Border agents and hospital intake staff move faster with one clean page than with a folder of loose records.
What Goes in a Ventilator Travel Go-Bag?
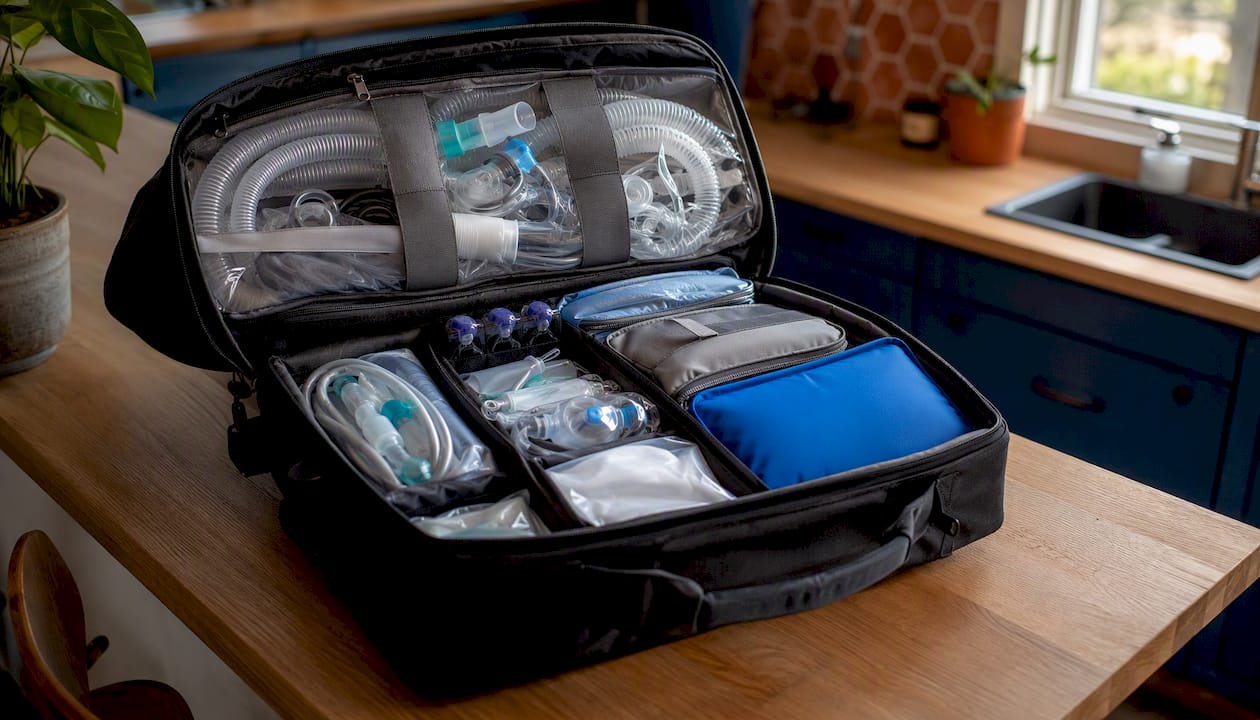
Your go-bag is the difference between a manageable equipment hiccup and a trip-ending emergency. Pediatric palliative care programs are specific about what belongs in it, and the University of Washington’s pediatric tracheostomy and ventilator care resource lays out the core contents clearly: a spare tracheostomy tube in your child’s current size, a second spare one size smaller, tracheostomy ties, a fully charged suction machine with catheters, a manual resuscitation bag with the right mask and adapters, extra ventilator circuits and tubing, and a written care plan with diagnoses and settings attached.
Here’s the fuller packing list built around that foundation:
Primary ventilator plus one to two backup units or spare battery packs, depending on how many hours a day your child depends on the machine.
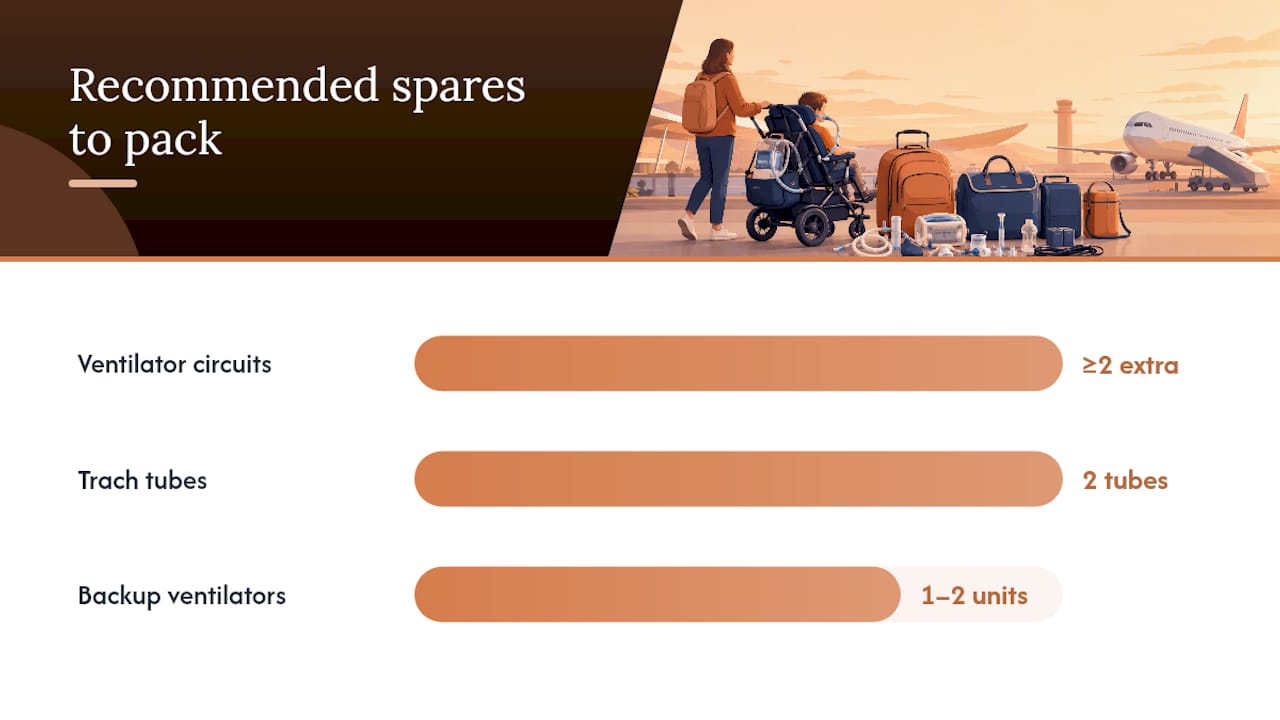
Ventilator circuits and tubing (pack extras beyond what you think you need).
Current-size trach tube and one size smaller, plus trach ties.
Suction machine, charged, with an ample supply of catheters.
Manual resuscitator (“bag”) with the correct mask and trach adapters.
Heat moisture exchangers (HMEs) and any humidification supplies your child’s setup requires.
Distilled water if your humidifier needs it.
Feeding supplies if your child also uses a G-tube or feeding pump.
Chargers, adapters, and any inverter you’re bringing for vehicle power.
Consumables need a quantity rule, not a guess. A workable baseline is to pack enough HMEs and suction catheters for the full length of the trip plus two extra travel days, and to treat any used or contaminated item as gone for good. Northwest Children’s guidance on long-term ventilation travel recommends restocking the entire kit after any use, no exceptions, so you’re never departing with a bag that’s already missing something from the last time you needed it.
Item Category | Quantity to Pack |
Ventilator circuits | At least 2 extra beyond the one in use |
Suction catheters | Enough for trip length plus 2 buffer days |
Trach tubes | Current size plus one size smaller |
HMEs | Daily use estimate plus 2 buffer days |
Backup ventilators/batteries | 1 to 2 depending on daily dependence |
Split your kit between carry-on and checked luggage carefully, or better yet, don’t split it at all when it comes to anything essential. Fragile items like circuits and suction canisters should ride in padded pouches, and everything should be labeled with your child’s name and a phone number in case a bag gets separated from you at a connection. A printable version of this checklist, along with a ventilator-settings worksheet your clinician can sign, is covered further down in this guide.
What Are the Airline Rules for Flying With a Ventilator?
Call the airline as soon as you have travel dates, not the week before. Ask about their medical device policy, what forms they require, carry-on allowances for multiple devices, and any check-in deadline tied to medical equipment. Some carriers run internal checks as far out as 48 hours before departure, so confirm the exact window with your specific airline rather than assuming it matches what you read for a different one.
The FAA requires carriers to give passengers clear information about in-cabin medical device use, including battery requirements and documentation expectations, under 14 C.F.R. Part 382. In practice, that means airlines must tell you upfront what they need from you, whether that’s a medical certificate, a letter from your child’s physician, or specific battery labeling. Bring more documentation than you think you’ll need. A copy of the letter of medical necessity and the airline’s own signed form should both be in your bag, not just in your email inbox.
Ventilators, suction machines, and related trach supplies belong in the cabin with you, never in checked baggage. Cambridge University Hospitals’ guidance for families traveling abroad with ventilator-dependent children is direct about this: checked bags can be delayed, misrouted, or simply inaccessible mid-flight, and a ventilator you can’t reach is a ventilator that isn’t doing its job.
At the airport itself, the routine looks something like this:
Arrive early, ideally two to three hours ahead of a domestic flight and more for international.
Expect security staff to ask you to power on the ventilator or demonstrate how it works.
Keep device manuals and the clinician letter within easy reach, not buried in a suitcase.
Confirm with the gate agent that your equipment counts as medical gear, not a standard carry-on, so it doesn’t eat into your baggage allowance.
Board with the ventilator and go-bag in the cabin, positioned where you can reach them from your seat.
Mobility International USA’s tip sheet on traveling with a ventilator notes that staff may specifically request to see the device powered on during screening, which is one more reason not to pack it at the bottom of anything.
In flight, a few practical wrinkles come up. If your child normally uses a wet (humidified) circuit, test a dry circuit at home before you fly, since in-flight humidification setups aren’t always practical and some families switch temporarily for the trip. Alarm volumes that sound fine in a quiet bedroom can get lost in engine noise, so check audibility ahead of time. And confirm battery runtime against your actual flight duration plus taxi and boarding delays, not just the scheduled flight time.
Pro Tip: Before boarding, brief the flight crew and designate one traveling adult, beyond yourself, who knows what each alarm means and what to do about it. If you need both hands for your child during an in-flight event, that second trained adult is the difference between calm and chaos.
How Should You Handle Car and Train Travel Safely?
Road and rail trips carry their own version of this planning problem, mostly around seating and stability rather than airline paperwork.
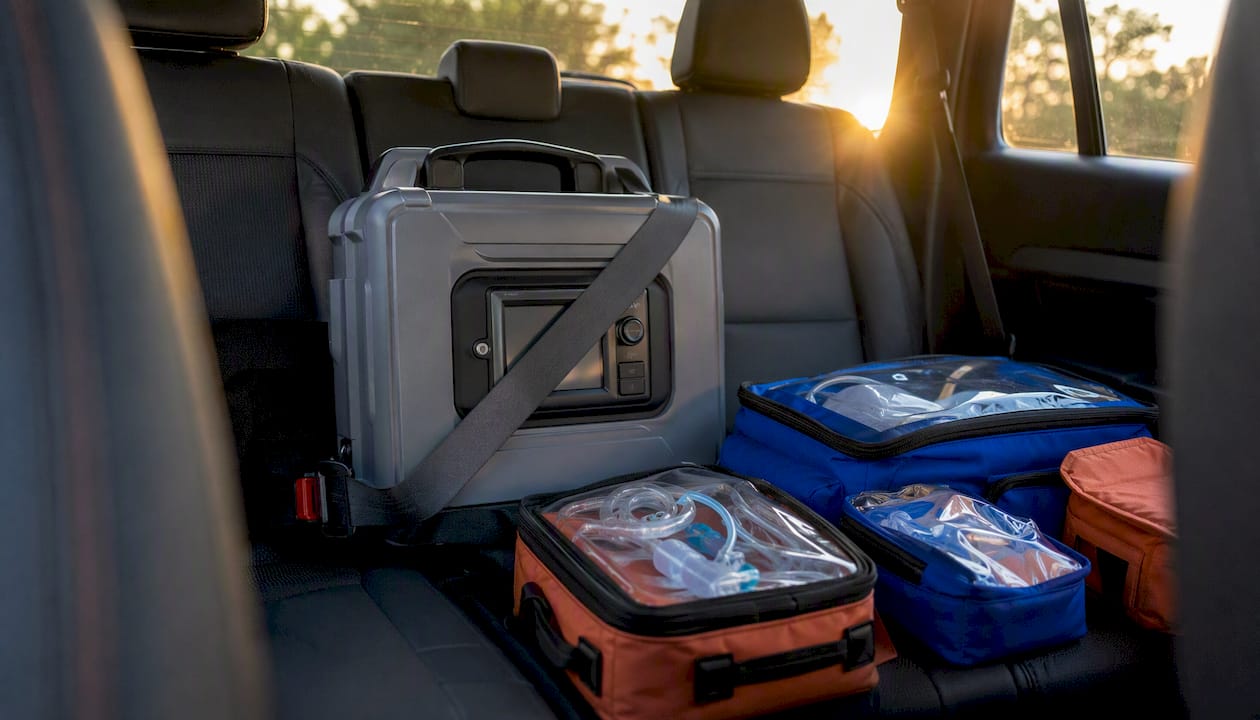
Placement matters more than most families expect. Guidance from UW Health’s patient education materials recommends keeping the child in the back seat, with a trained caregiver seated beside them in the back rather than up front, so someone is watching the ventilator and airway the entire drive. If your child uses a car seat or specialized restraint because of trach or vent equipment, work with your DME provider or a certified child passenger safety technician to confirm the restraint is compatible with the equipment setup, since standard car seats aren’t always designed with tracheostomy positioning in mind.
Secure the ventilator itself so it can’t shift, slide, or yank on tubing during a hard stop. A seatbelt-secured equipment bag or a rigid case wedged against the seat frame works better than loose placement on a seat. Suction equipment and emergency supplies should sit within the back-seat caregiver’s reach, not in the trunk.
For trains and other public transit, call ahead. Most rail services have accessibility desks that can flag priority seating near outlets or help you board with medical equipment more efficiently. Power availability on trains and buses is inconsistent at best, so treat any onboard outlet as a bonus, not a plan, and pack enough battery runtime to cover the full trip without needing to charge en route.
How Do You Plan Ventilator Batteries and Handle Equipment Failure?
Power planning comes down to simple math done early, not guesswork done at the gate. ResMed’s travel guidance recommends packing extra manufacturer batteries, confirming your device’s voltage compatibility with your destination’s power grid, and planning for stretches without outlet access at airports or on the road.
Here’s a working sequence for figuring out how much power you actually need and what to do if it runs out:
Add up total travel time, including flight duration, layovers, ground transfers, and a two-hour buffer for delays, then match that against your battery’s rated runtime.
Pack manufacturer-approved batteries, not generic replacements, since compatibility issues can cause a battery to fail exactly when you need it most.
Check destination power compatibility ahead of time, bringing the correct plug adapters or a voltage converter if you’re traveling internationally.
If the ventilator fails, switch immediately to the manual resuscitator while a second adult activates the backup ventilator or spare battery.
If suction fails, use a manual suction device if you carry one, and prioritize getting to medical care if secretions can’t be cleared.
Call your home LTV team or the device manufacturer’s technical support line for troubleshooting guidance, even from the road, since many failures are things a phone call can walk you through.
Head to the nearest pediatric-capable hospital if the failure isn’t resolved quickly, using the emergency summary sheet to speed up intake.
Environmental conditions can throw off equipment in ways parents don’t always expect. Vibration, altitude changes, and temperature swings can shift ventilator sensor readings and alarm sensitivity, according to guidance on how environmental factors affect sensor-based equipment. Test your child’s alarm volumes and settings in a loud, moving environment, like a car with the radio on or near an airport gate, before you travel, so the first time you hear the alarm under real conditions isn’t during the actual trip.
What Medications and Documents Should You Pack?
Pack enough medication for the full trip plus a buffer of at least a few extra days in case of delays, and know which medications need refrigeration or temperature control during transit. A small insulated pouch with reusable ice packs handles most temperature-sensitive medications for a day of travel, but confirm specifics with your pharmacist if your child’s regimen includes anything unusual.
Before you go, confirm with your pediatrician that routine and destination-specific vaccinations are current, and bring a copy of the immunization record. AboutKidsHealth’s guidance on traveling safely with a tracheostomy recommends checking immunization status as part of standard pretravel prep, alongside contacting your airline and insurer early.
The document set to carry includes:
A one-page emergency summary listing diagnosis, ventilator settings, trach size, and allergies.
Prescriptions and device manuals for the ventilator and suction machine.
Letter(s) of medical necessity from your child’s clinical team.
Insurance details, including any repatriation coverage.
Completed airline medical forms, signed and dated.
For families whose travel plans intersect with immigration processes, such as a required medical exam as part of a visa application, resources on pediatric medical exam requirements can help you understand what documentation those specific exams require, which sometimes overlaps with what you’re already assembling for general travel.
Should You Buy Travel Insurance and What About Customs Abroad?
Buy travel insurance that explicitly covers medical evacuation and equipment loss or damage, not just trip cancellation. Ask insurers directly whether pediatric ventilator equipment is covered under their standard medical evacuation clause, since some policies treat durable medical equipment as a separate line item that needs to be added on.
For international travel, customs officials may ask to see documentation for the ventilator and related supplies, particularly if you’re carrying multiple devices or unusual quantities of medical consumables. Your letter of medical necessity does double duty here. AboutKidsHealth’s pretravel guidance recommends carrying documentation for customs whenever international travel is involved, and clinics sometimes need a week or more to prepare and sign these letters, so request them well before your departure date.
If you’re considering renting equipment at your destination rather than carrying everything, proceed carefully. A common and risky assumption is that local hospitals or medical suppliers will have a compatible pediatric ventilator or the right proprietary circuits on hand. In reality, they often don’t stock pediatric-specific models, and highly dependent children are safer traveling with their own primary and backup units rather than counting on local sourcing to work out. If you do explore rental options, ask specifically about pediatric compatibility and circuit type before you commit, not after you land.
What Should You Do if Something Goes Wrong While Traveling?
Having an emergency plan means you’re not making decisions from scratch in a stressful moment. Northwest Children’s guidance on long-term ventilation travel recommends researching pediatric-capable hospitals at your destination before you leave, precisely because you don’t want to be searching for that information mid-crisis.
Here’s the sequence to follow if equipment fails or your child becomes unwell:
Switch to the manual resuscitator immediately if the ventilator stops functioning or alarms and won’t reset.
Deploy the backup ventilator or spare battery while a second person manages the resuscitator, if you’re traveling with another adult.
Call local emergency services if your child’s condition doesn’t stabilize quickly.
Head to the nearest pediatric-capable hospital, using your prepared list rather than searching under pressure.
Call your home LTV or clinical team for guidance, even remotely, since they know your child’s history better than any new provider will on first contact.
Contact the device manufacturer’s support line if the failure looks mechanical rather than clinical.
Call your travel insurance emergency line to start any evacuation or claims process as early as possible.
Before you leave, build a simple contact card with the local emergency number for your destination, the nearest pediatric hospital’s address and phone number, your home team’s direct line, the device manufacturer’s support number, and your insurer’s emergency line. Give a copy to every traveling adult, keep a digital copy in your phone, and tuck a printed copy in the go-bag itself, since phones die and signal drops at the worst possible times.
What’s in the Downloadable Ventilator Travel Packet?
Opulentprivatecare’s downloadable travel packet turns everything above into paperwork you can actually hand to someone. It includes a printable go-bag checklist matching the quantities described earlier, a one-page ventilator settings worksheet with a dedicated clinician signature box, a one-page emergency summary card, an airport security prep checklist, and a caregiver training checklist for anyone joining the trip who isn’t medically trained.
The clinician signoff box on the ventilator worksheet needs a few specific fields filled in: device model and serial number, prescribed settings, oxygen requirements if applicable, and the result of a Fitness to Fly test if one was performed. Getting this signed before you leave means you’re not chasing down a clinician’s signature from an airport lounge.
Give a physical copy to the airline or ground transport provider whenever they request documentation.
Scan every document to cloud storage so a copy exists even if the physical folder gets lost.
Keep the printed originals in the child’s carry-on bag, not checked luggage.
Update the packet before every trip, since ventilator settings and medication lists can change between travel dates.
This packet reflects the kind of clinical rigor Opulentprivatecare brings to in-home pediatric nursing for children with tracheostomies, ventilators, and complex respiratory needs across Georgia. Families working with Opulentprivatecare’s matched nurses already have someone who understands their child’s exact equipment and settings, which makes filling out a travel worksheet like this a five-minute conversation rather than a scramble. If your family is weighing options for continuity of pediatric care while traveling or relocating temporarily, that same nurse-matching approach applies.
Point | Details |
Clinician signoff box | Fields include device model, serial number, prescribed settings, and Fitness to Fly result. |
Distribution rule | Physical copies go in carry-on luggage; digital copies live in cloud storage as backup. |
Update cadence | Refresh the packet before every trip since settings and medications can change. |
Airport use | Provide a copy to airline or ground transport staff whenever documentation is requested. |
Caregiver perspective: plan early, practice the plan, and reduce stress
The families who travel most successfully with a ventilator-dependent child aren’t the ones with the fanciest equipment. They’re the ones who practiced the plan before they needed it. Running a mock battery swap in the living room, or triggering a fake alarm and timing how fast everyone in the house responds, takes the panic out of the moment when it happens for real on a plane or in a rental car three states from home.
Training a nonclinical travel companion, a grandparent, an aunt, a family friend, doesn’t require turning them into a nurse. It requires a short, specific checklist: how to switch to the manual resuscitator, what each alarm sound means, and who to call first. Walk them through it once, hands-on, before the trip, not verbally in the car on the way to the airport.
None of this eliminates risk entirely, and no article can promise that. But a family that’s practiced the plan, packed the backups, and gotten the paperwork signed is dramatically better positioned than one hoping nothing goes wrong. Planning doesn’t just reduce risk. It’s usually what makes the difference between a trip everyone remembers fondly and one nobody wants to repeat.
Sources
The checklists and clinical guidance in this article draw on published pediatric respiratory care resources and federal aviation rules, including:
These sources, along with practical guidance from UW Health on transporting children with respiratory equipment and AboutKidsHealth’s pretravel checklist, shaped both the checklists above and the downloadable clinician-ready packet.
This article is general information, not a substitute for advice from a qualified doctor. Consult a qualified healthcare professional about your own circumstances before acting on anything here.
Recommended
Comments